Masking

Using layer masks in Photoshop is a HUGE difference than in Paint Shop Pro. There are several ways to use layer masks in Photoshop. In my opinion, they are much more versatile in Photoshop, but I will leave that up to you.
Lets Get Started!
First off, what is a layer mask? I think the real question is, what is a mask. Ask yourself that one more time... What is a mask? Pretty silly, huh?
Well, like wearing a mask on your face, layer masks are pretty much the same. They hide portions of a layer.
First thing is to decide what images you want to combine by using the mask.
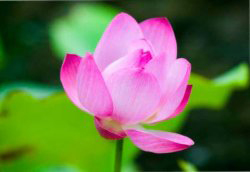
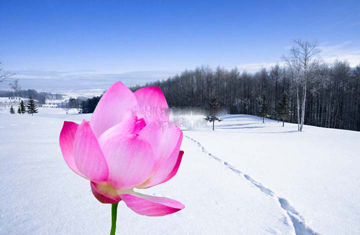
Here I have chosen two stock images that I have found online at http://www.yunphoto.net/ (feel free to use these images for this tutorial)

Now place the flower image as a new layer on the snow image. (just drag and drop the layer into the other image)
You should now have the flower on top of the snow background.
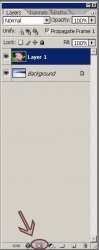
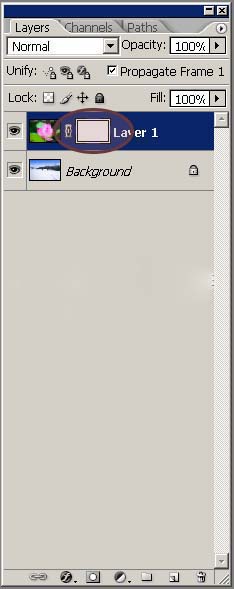
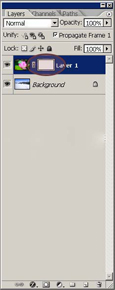
Ok now you will see a little icon at the bottom of your layer pallet. With your flower layer highlighted, click on that icon. This will add a layer mask to that layer.

There will be an attached white "layer" added to the layer itself. This will be the only thing you should be painting on
 .
.
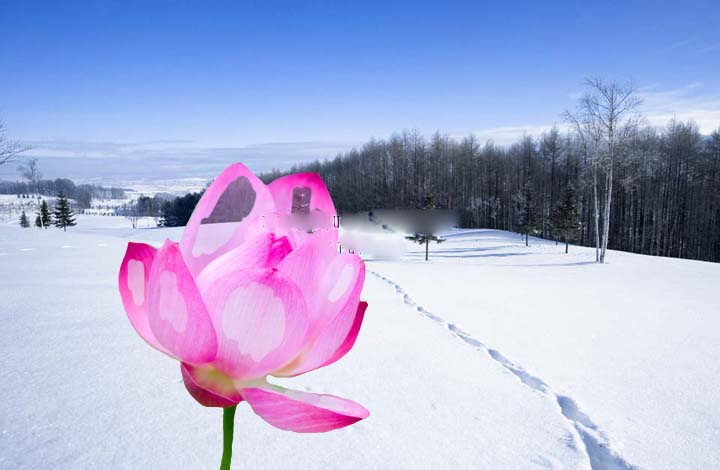
Now grab your paintbrush tool and just using black, paint around the flower to get rid of the background. (this is the most tedious part)
The biggest advantage of using the layer mask instead of just the eraser, is that if you notice that you made a mistake, or changed your mind about an area, you can simply paint the area back on using white.
Now you should have something that looks like this:
You can now right click on the layer mask and "apply layer mask".
Now for some fun stuff.
Click on the icon at the bottom one more time to add the mask back to the layer.
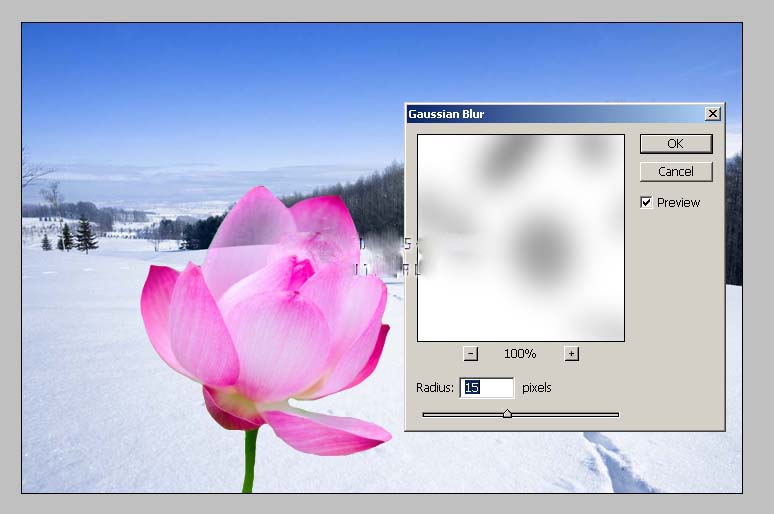
This time we are going to make the flower just a little translucent.
Using the paintbrush with a gray color, paint a little bit inside the flower petals where it looks like you would be able to see through them just a little. It does not have to be perfect. We will fix that in just a minute.

Now just blur the layer mask. Filter > Blur > Gausian blur set to around 15 pixels.
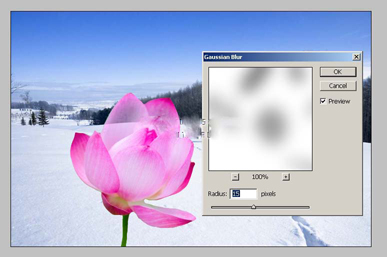
Now you can see just a little bit through your flower.
If you like, you can now add a few layer styles and other details to make it all your own. Merge visible and you are finished! Easy, huh?

I hope you have enjoyed this tutorial! I would love to see your results.