Smart Objects
Did you know that Photoshop has a feature called Smart Objects?
Have you ever started on a tag and noticed that the brush tool doesn't work on some layers without "Rasterizing" it?
Have you ever wondered why the thumbnail of your "Placed" layers have that little icon on them?
Here I am going to show you a little about Smart Objects.
I am using a fabulous kit from CrazyCarita called Topaz. (This kit has been retired). This is one of 12 kits in the Birthstone collection at Creative Design Outlet. I am also using parts from her freebie zodiac addon kit you get upon purchase.
First off, you want to open a canvas. I always use 500x500 pixels with a white background.
You can use whatever size you like.
Once you have your canvas open, simply drag an element from the kit directly onto the canvas.
This will "place" the object on your tag.
(If you are using a Mac, you will need to go to File > Place and find your element instead of dragging.)
Now lets show the difference.
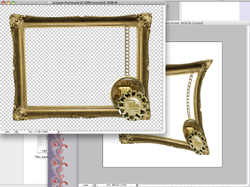
The top frame is a raster layer, and the bottom frame is the Smart Object. The little white icon on the thumbnail shows the difference in the two.

Now... let's see what we can do with these smart objects, shall we?
First, we can edit what is in the smart object.
Double click on the THUMBNAIL of the layer to open the smart object.
BUT! If you dragged in a PNG/JPG or any other flattened image file, you will get this dialog box:

Make your changes and merge them all together. (if Jpg, then flatten).
File > Save
Then close that image and return to your tag. You will see that those changes are now applied to your tag.
There is a way around this. You DO NOT need to flatten the layers.
This is actually a longer process and kind of confusing, but once you get the hang of it, the confusion will be gone.

Make your edits. I prefer to keep them in layers, just in case I want to go back and edit it again later.
So instead of simply saving and closing to return to the image, File > Save As...
Save it to your desktop or any other temporary area you use.
Now... when you close this image, you will notice that the changes were not applied to your tag...
Don't worry, we will do that now.
Right click the Smart Object in the layers pallet and choose "Replace Contents..."
Find your edited image that you just saved and click OK.
Now your changes are applied!
But guess what! That is the only time you will have to do that to that layer. From now on, all your changes will save to your tag. But you will need to do this to the other layers also.
And if you delete the temporary image from your desktop, it WILL NOT affect the changes in your tag.
The reason behind that is, you have now converted your smart object from a PNG to a PSD when you replaced the contents.
Now that we have discussed the editing of a Smart Object, let's move on to warping! My favorite part.
Make sure your Smart Object is highlighted in your layers pallet.
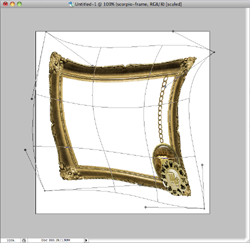
Edit > Transform > Warp
I can't really explain how you manipulate the warp, but if you click and drag anywhere on your element, you will see how it works and how it moves and what you will need to warp it.

Now there is a checkmart at the top of your menu. Click on that to "set" your transformation.

So, what is so special, you ask?
Well, now let's say you are halfway done with your tag... and you realize you forgot to do something to your frame.
Double click the thumbnail to edit the Smart Object.

Holy COW!!! There are no transformations?! The smart object kept your layer the exact same way you saved it the first time! Now you can make any edits you would like and then save them and close it.
Upon returning to your tag, you will see that the changes you made are applied to the layer along with all the transformations you made before! I swear, it is like magic! WOO
Now you can add shadows to your smart object as you would a normal layer via Blending Options.
You can continue to do your layers in this way to create some really interesting effects in your tagging.
Some versions of Photoshop CS will allow you to use certain filters on your Smart Objects, but we will get into that at a later time.
Now. I hope you have learned something new here and continue to experiment more with smart objects.
This tag is created totally from warped smart objects.
