Working with Type
When you select your type (text) tool, you will see something like this at the top of the screen. Here I have outlined what button means what.

First you want to select your type tool from your layers pallet and then click on the canvas. Type whatever you want and then select all of the text to add any extra options to it. you must have the entire text highlighted for any of the options to appear.
To highlight the text, you may either triple click directly on the text itself, or you can double click the layers thumbnail, or you may select it the same way you would select text in your browser, or you can click the "End" button on your keyboard and then Shift + click the first letter in your text.
Then you can change the size, color, orientation, and any other options you have.
You can refer to your Character Pallet for more options for the text.
Highlighting only part of the type will allow you to apply the options to it without effecting the un-highlighted type.
This example shows normal type and then a styled type.
The styles include:
- Different font
- Different size
- Different anti-aliasing
- Different color
- Warping

Type on a path
You may also type on a path in Photoshop. You may do this around any shape you choose.
Place your path on your canvas by using one of the path tools. These include shapes (rectangle, ellipse, custom, etc) or a shape created by using your pen tool.
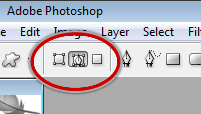
When making your shape. Select your shape tool and then choose the option shown here:

Now draw out your path.
Now select your Type tool and place it directly on your path. Your cursor will change to look like this (outline added for visibility):

Now you may type out your words. The path will not be visible on the finished product. Here is an example of some type on a path:
